Choosing your vermicompost bin setup
Vermicomposting is the process of composting with the help of earth worms. Red wigglers are the most common worm used for vermicomposting. In this process, worms eat organic waste (like kitchen scraps) and turn it into a nutrient-rich soil amendment. Vermicomposting is gaining in popularity because it is a simple way to divert food scraps and paper products from landfills and create a valuable addition for garden and houseplants. Vermicomposting is a great way to include children in suitability and environmental stewardship. There should be only fresh, earthy smells coming from your compost, so it’s very pleasant to compost in you home, whether you have a yard or not. Vermicomposting can be done on a very small scale and is best done indoors in Ontario, Canada (where I’m writing this from). This blog is written in a very Canadian context, as that’s my experience, but much of this information will be universal. I’ll do my best to point out regional context as it applies.
Wondering how vermicomposting works and why you should start doing it? This is the first of a five part series on the basics of how to start a vermicompost system for anyone new to the hobby. This post will explore considerations in choosing the best vermicompost bin setup for your needs!
Key components of successful vermicomposting
There are a few things you need to get started vermicomposting: a bin and location for composting, bedding material, a food source and worms. While it seems like worms are the central component of this system, they should be the last thing acquired and added to a new vermicompost system. Be sure to have their habitat set up before getting your worms.
Your worm bin or container
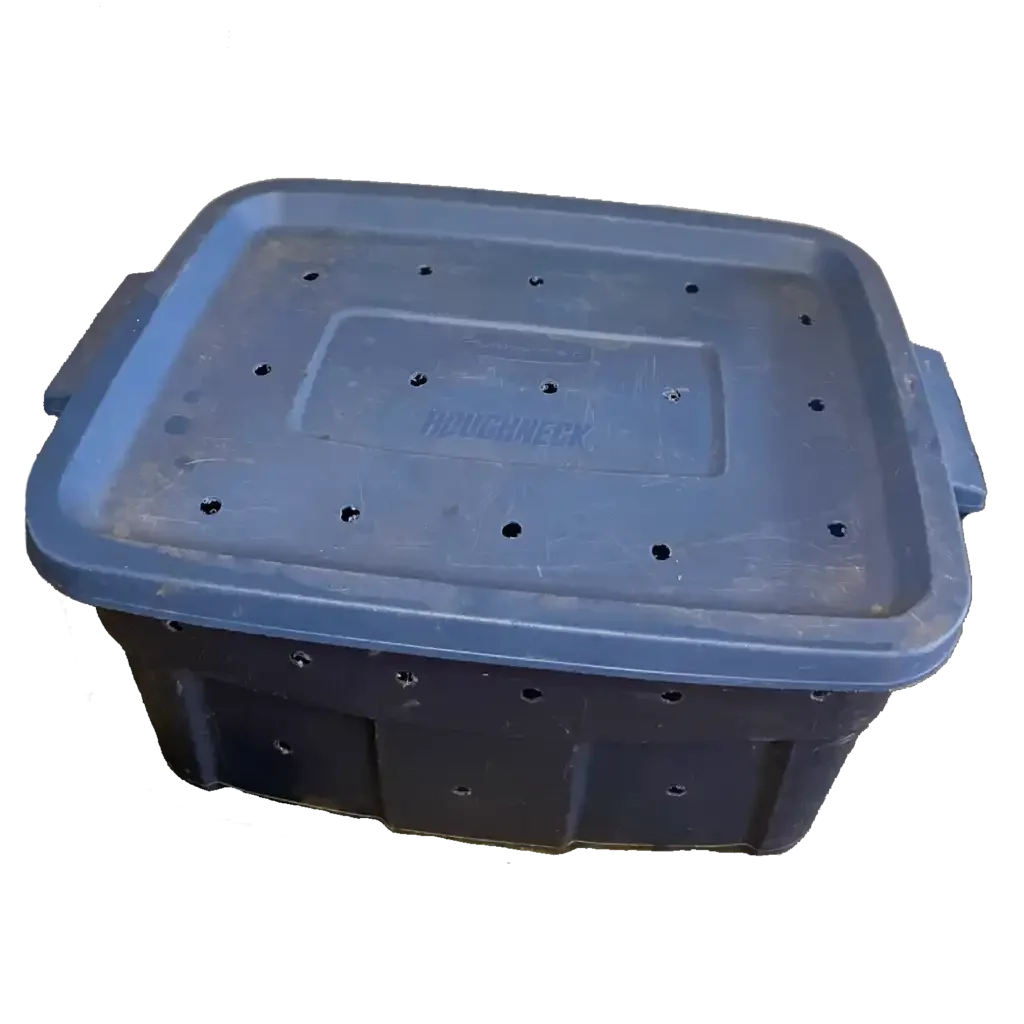
Your worms can live in just about anything. Your system can be as simple or complex as you want. If you’re just getting started, a Rubbermaid tote with holes drilled in the side, bottom and lid makes an excellent worm bin. Honestly, this is the tried and true approach I always suggest. It’s low-investment, storable, and accessible for most who are interested. The only downside of this, is that your Rubbermaid bin doesn’t come with an instruction manual on vermciomposting… this set of blog posts is intended to correct that!
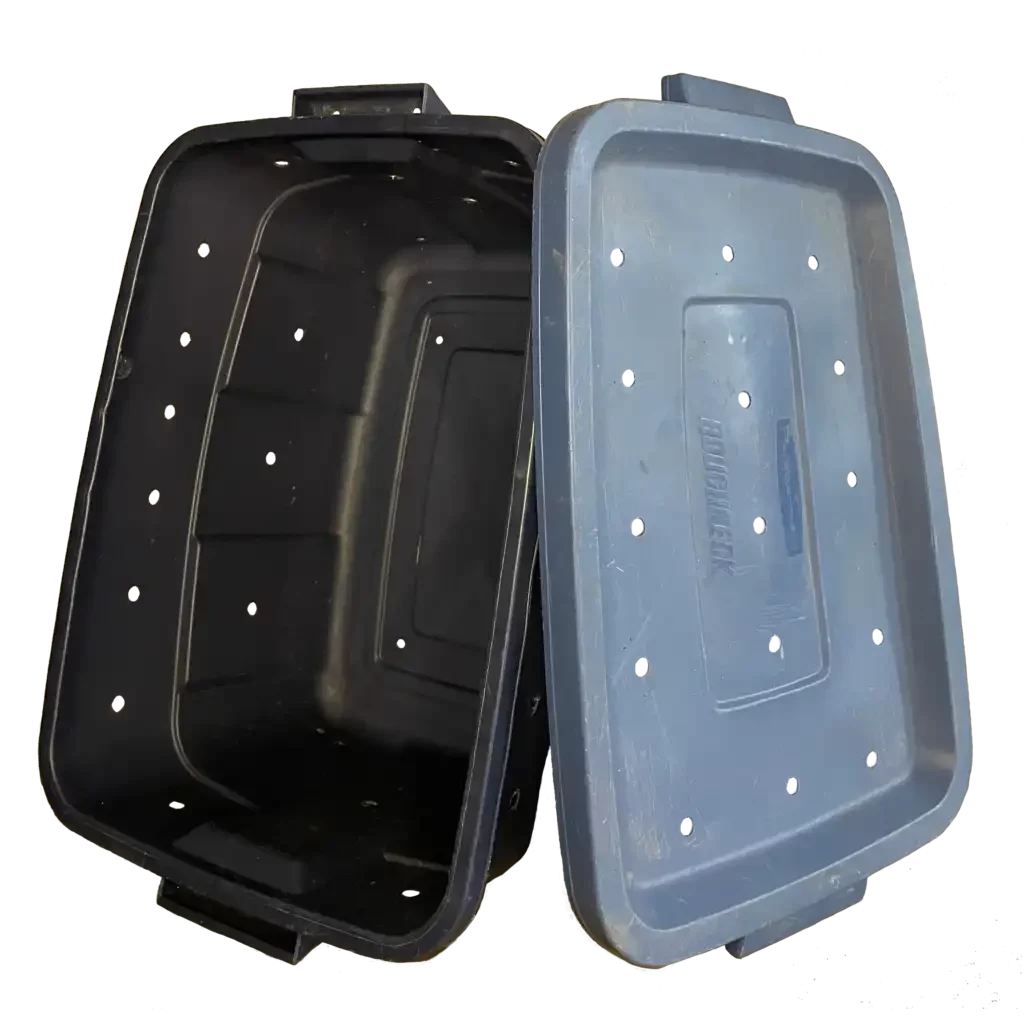
If you’re opting for a DIY bin, you’ll want to consider the material your bin is made out of and the size of bin. (This is a main reason I keep going back to Rubbermaid totes). Flexible plastic used for the Rubbermaid bins allows them to be drilled into easily. I’ve found other harder plastics to be brittle and crack when drilled into. And the medium sized Rubbermaid tote is a perfect size for vermicomposting – not too big or small. When I say “too big”, I really mean too deep. And, especially for small home compost systems, too heavy. In most cases, I’m assuming a vermicompost system needs to be lifted and handled. These systems get heavier than you might think. The type of bin you choose will also determine where you can keep your vermicomposting system.
Worms use surface area to work, so add more surface area to expand, rather than depth. This means that additional surface area rather than depth is required to increase productivity. In the context of home composting, I would suggest that adding more small bins that are rotated is a good approach rather than trying to come up with something that will meet your needs forevermore right from the start. This allows a new vermciomposter to start with one bin and add additional bins to expand.
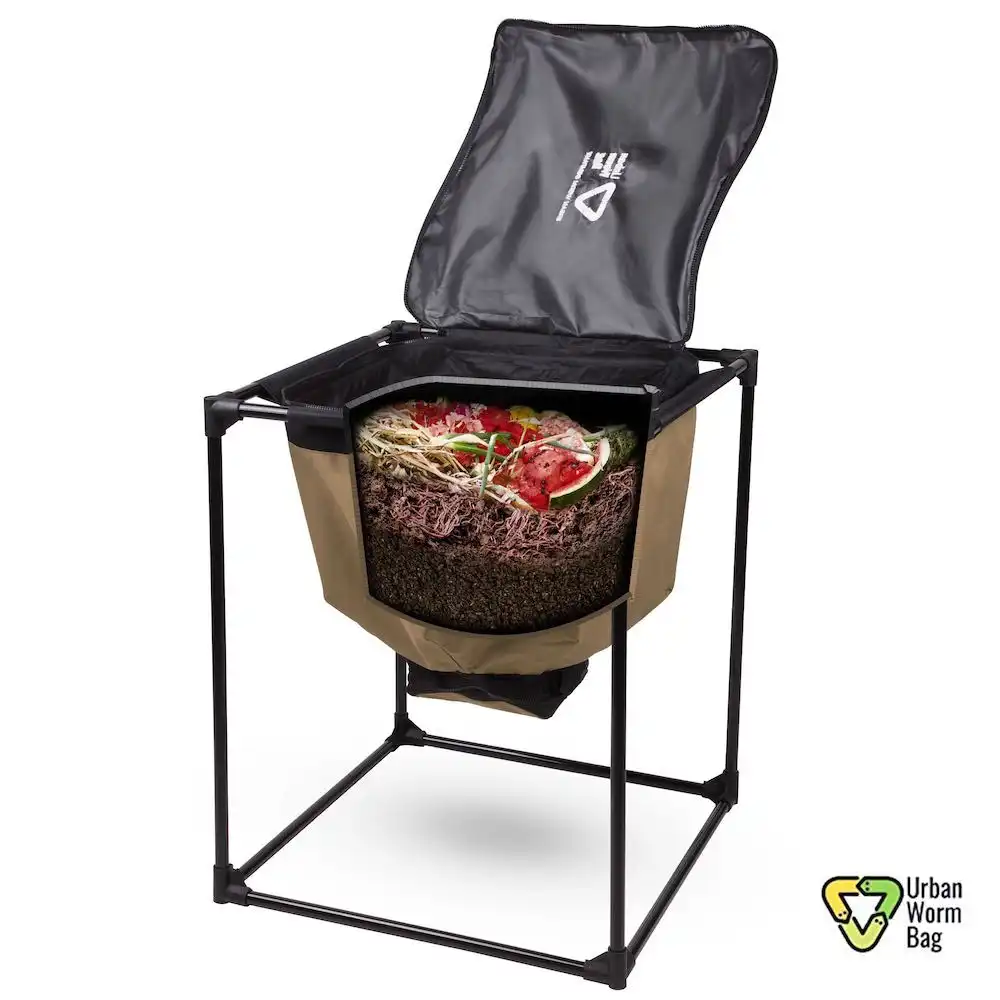
There are commercially available options, of course. The urban worm bag is a great home system that uses a continuous flow approach, where you harvest castings out of the bottom and continue to add food scraps to the top. This system can be set up indoors or outdoors and is made out of a durable, breathable fabric. The company that makes them, Urban Worm Company, also boasts that their systems are made of recycled materials.
Stacking systems are another option that can be used indoors or out. Stacking systems have trays that vermicompost in each tray and once the vermicompost is ready, it moves to the next tray while castings are harvested from the bottom. These systems come in all shapes and sizes with different features. Some of the features you might want to consider are: how easy is it to harvest vermicompost, is there collection or drainage for leachate (liquid that drains from vermicompost), how many trays come with the system, and what material is it made out of?
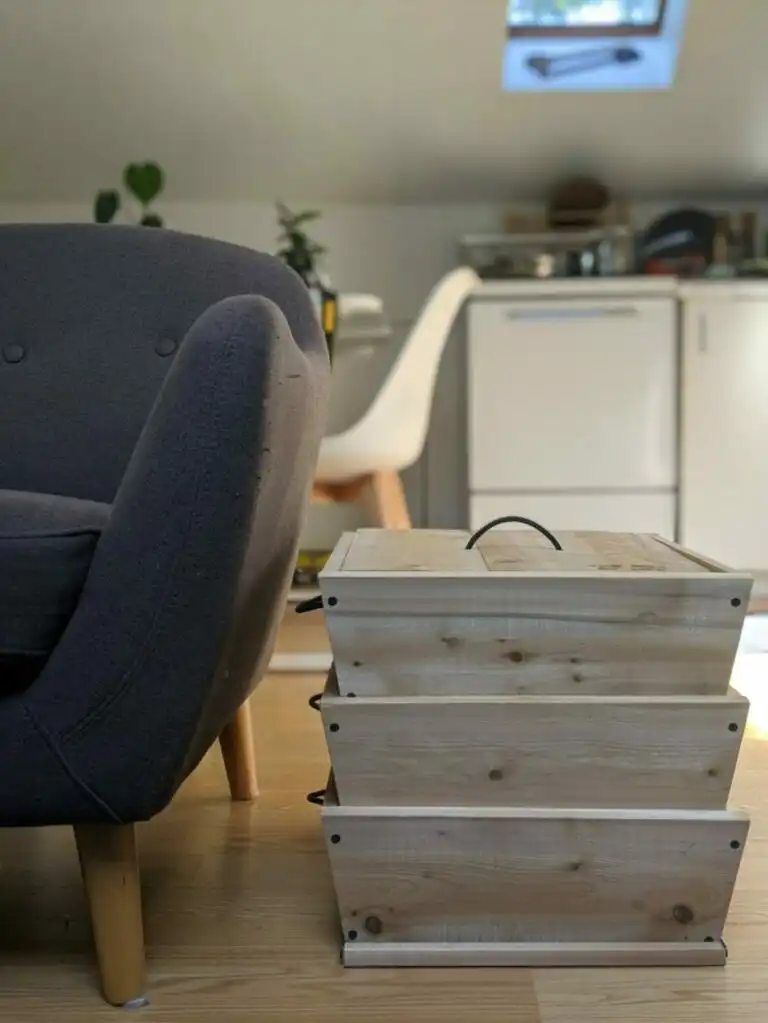
The Box of Life is a locally sourced (in Ottawa) wooden stacking bin that works on the principal of having worms migrate to the top tray(s) while leaving finished vermicompost on the bottom trays. The Box of Life is also Canadian designed and manufactured. Bonus points, in my book, for being local.
Temperature
Worms are cold-blooded animals and their metabolism will adjust according to temperature. So, when a vermicompost system is outside of its ideal temperature range, production slows down. Red wigglers conveniently share ideal temperatures with humans. This means that your temperature controlled house will pretty much always be an ideal temperature for you worm friends to perform at their fullest. Storing a Rubbermaid bin under the kitchen sink is a common choice, but they’ll be happiest if they are only poked at about once per week, so a garage or storage room shelf is a reasonable choice.
Vermicomposting outside can be done in Canada. The biggest challenge is extreme cold, but heat can also be a factor. If you’ve got a garage or barn, that’s a great second choice. Snuggled in next to a heated building is a great way to borrow some waste heat in the winter. And finally, using seed heating mats can help your vermi-friends make it through those long Canadian winters. If you plan on outdoor composting, know that some trial an error may require you to re-seed your system in the spring with a new culture of red wigglers. But red wigglers are hearty little dudes and may have cocoons stay warm enough to survive and may come back in the spring. Heat is unlikely to get extreme enough to be truly dangerous to your red wigglers, but maintaining moisture content in vermicompost systems in direct sun for all or most of the day could pose a challenge.
Air and moisture
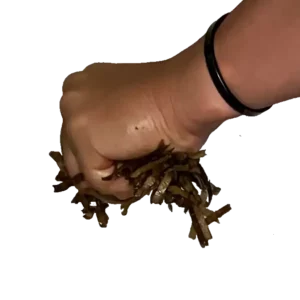
The main thing to keep in mind is that your worms need oxygen and your bin shouldn’t have the ability for water to pool. After some trial and error, you will not likely be relying on drainage in your bin. Moisture will be balanced in materials before adding them to your vermicompost system. Rule of thumb with moisture content for vermicompost systems is to think of a out sponge. If you squeeze materials in your bin firmly in your fist, you should be able to get a few drops of water out, but if it’s pooling and sloppy, your bin is too wet. Air and moisture are the key components that vermicomposters are perpetually trying to balance. There will be more about how to keep air and moisture balanced in every part of this series of posts.
This was the first of a 5-part series for those who are just getting started vermicomposting. Up next, we’ll discuss vermicompost bedding; what to use and why it’s an important consideration. After bedding, this series of blog posts will explore: food source, how and where to get red wigglers in Ontario, and finally harvesting vermicompost from your system.